How Computers Work: The 1s And 0s
This is still a draft
Introduction
Computers are amazing. From the simpliest Notes app on your phone to the incredible systems used to put robot helicopters on Mars, they power our world. And, most amazingly, they do everything with nothing more than a bunch of 1s and 0s.
This is the story of how that works.
Where It All Starts
A Toggle Switch
Before we talk about the 1s and 0s, let's look at a light switch. It has two positions: OFF and ON. Clicking or tapping the switch flips it back and forth between the two positions.
Try it and see.
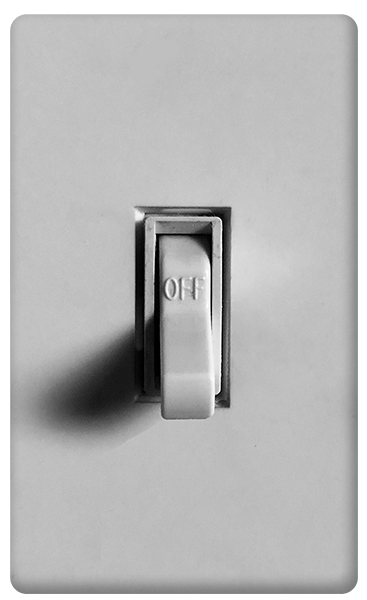
By the way, a formal name for that flipping back and forth is "toggle" (e.g. if we toggle the switch when it's in the OFF position it gets turned ON. Toggling it while it's ON turns it OFF). We'll be using that word a lot in this post.
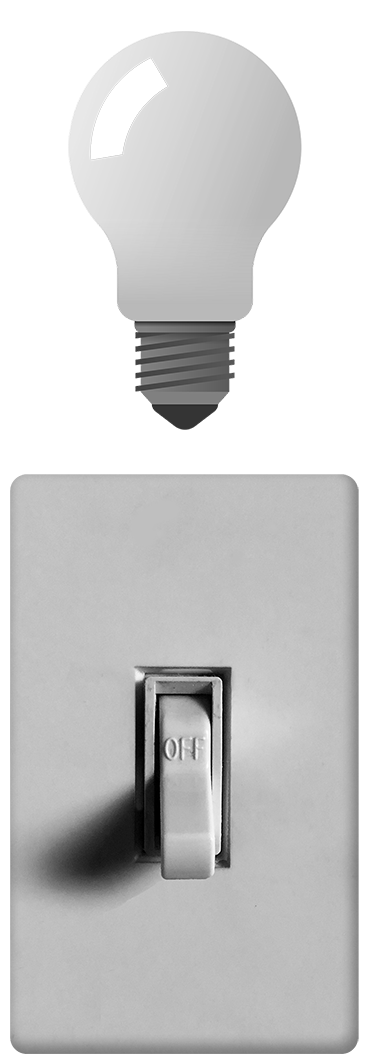
Adding Some Light
A switch that isn't connected to anything isn't a lot of use. Let's connect ours to a light. Now clicking the switch toggles the light on and off too.
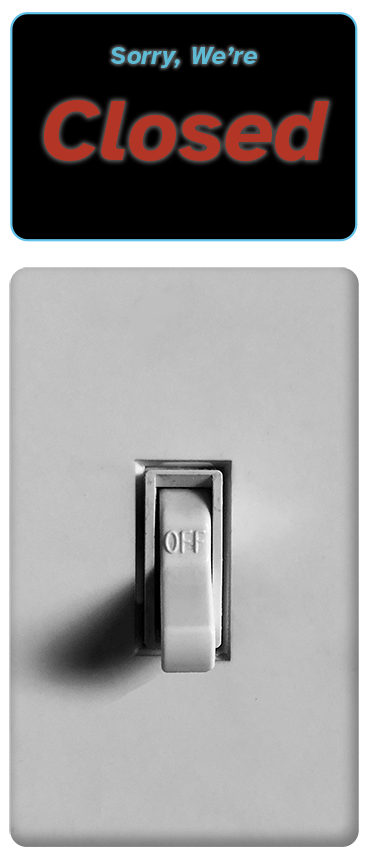
Switching Between Things
Of course, our switch doesn't have to control a light. It could control a fan, a garbage disposal, or an air conditioner. Anything that needs to be turned off and on.
Instead of turning something off and on, we could also use the switch to toggle back and forth between two things. For example, we could have the switch control an "Open/Closed" sign for a shop.
Toggling this switch ON shows the "Open" sign. Toggling it OFF changes the sign to "Closed".
A Little Bit Of Data
Instead of a sign that says "Open" or "Closed", let's attach a sign with a number on it. When the switch is OFF, the number will be "0". When the switch is On, the number will be "1".
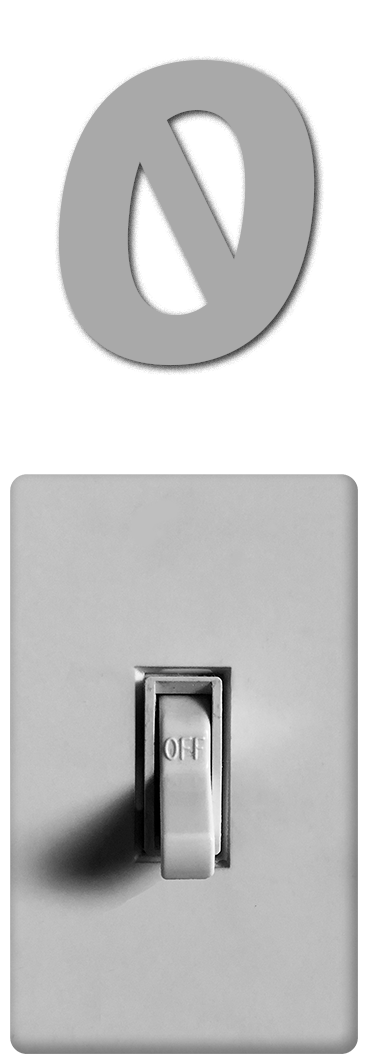
We'll be using this exact setup for the rest of this post. The 0s and 1s will become little bits of data that we combine with each other to do useful things. So, lets call each switch and its number a "bit".
And, believe it or not, that's all we need to make a computer.
Imaginary Computers
Laying The Groundwork
We'll be making a bunch of imaginary computers as illustrations. Each one will have two parts:
a Screen area which shows what we'd see in the real world
a Memory area that represents the inside of the computer that we wouldn't normally be able to see. We'll be using it to store bits
Computers don't have brains. The way they "remember" things is by toggling microscopic bits inside themselves that they can check later when they need to look up information. That's the reason we're calling the area "Memory". The rest of this post is dedicated to explaining how that works.
Our First Computer
To get started, here's a computer with a button on the Screen that doesn't do anything and without any bits in the Memory. There's nothing useful about it other than showing us what our illustrations are going to look like.
Our First Bit
Now, let's make a computer that does something. This one has a single bit in its Memory. Since this is an Imaginary Computer, we could click the switch to toggle the bit directly in the Memory even though it's "inside" the computer. But, let's set it up more like a real world computer and add a "Toggle Bit" button on the Screen that we'll use to do the toggling.
Give it a shot to test it out.
Seeing The Bit
We can see our bit in the Memory of our Imaginary Computer, but, since it's "inside" the computer, we wouldn't be able to see it in the real world. So, let's show the current number for the bit beside the button on the Screen as well.
Now, when we click the "Toggle Bit" button we see the displayed value on the Screen change as well as the actual bit in Memory:
A Second Bit
We can store more than one bit in our computer's Memory.
Let's add another one connected to another button and label the bit/button pairs "A" and "B" so we can keep track of what's connected to what.
Clicking one of the buttons toggles the corresponding bit without affecting its neighbor.
A
B
Counting With Bits
Adding Bits Together
Apps can combine the values from multiple bits in Memory together to do useful things on the Screen. For example, we can make a "Total" display on the Screen that shows the values of the bits in Memory added together.
Click the buttons and you'll see that:
If both bits are toggled to "0", the Total is "0"
If we toggle either "A" or "B" to "1" and leave the other bit at "0", the Total becomes "1"
If we toggle both "A" and "B" to "1", we get a Total of "2"
0
Total
A
B
Adding Another Bit
If we wanted to count to three, we could add another bit/button pair like this:
0
0
Total
A
B
C
We can now get a Total value of "3" if we toggle all the bits to "1".
We could use this approach to run our comptuers, but there are two things about it that aren't great:
We have to add a new bit for every number we want to be able to count up to (e.g. we'd need 100 bits if we wanted to count to 100)
We can get the same "Total" value in multiple ways. For example, we can get a Total of "1" with our bits toggled in each of these ways:
A = 1 :: B = 0 :: C = 0
A = 0 :: B = 1 :: C = 0
A = 0 :: B = 0 :: C = 1
There turns out to be a better way.
Counting With Multipliers
The technique to eliminate both issues is to multiply the value of each bit by a specific amount before counting it.
Specifically:
The "A" bit gets multiplied by 1
The "B" bit gets multiplied by 2
The "C" bit gets multiplied by 4
Try toggling these bits one at a time and watching the Total. Then, do two at a time, then all three.
Total
A
B
C
The first number beside each button is still the value of the bit itself and matches what's above the corresponding switch in the Memory (i.e. either 0 or 1).
The next number is the multiplier value (e.g. 1, 2, or 4).
The final number at the end of the line for each button is what gets used to calculate the Total. It's either "0" if the bit is toggled to "0", or it matches the value of the multipler (e.g. 1, 2, or 4) if the bit is toggled to "1".
Using the multipliers does two things:
We can get a Total range from 0 to 7 with three bits (as opposed to just 0 to 3 that we had in the prior example)
There's only one combination of bit toggle positions for each possible "Total" value. For example, the only way to get 3 is to toggle "A" and "B" to "1" and "C" to "0". No other combination can produce 3.
(I encourage you to play around with the Screen toggle buttons to get a Total of 0, 1, 2, 3, 4, 5, 6, and 7 and to see there's only one way to produce each value)
Doubling Growth
Let's add two more bit/button pairs.
We'll make a "D" bit with a multiplier of "8" and an "E" bit with a mulitplier of "16".
While we're at it, I'm going to reverse the order of the switches in Memory from: "A, B, C, D, E", to: "E, D, C, B, A". That doesn't have any affect on the way things work. It's just to make things easier to read in later examples by putting the bit with the switch with the highest multiplier first.
Play around and you'll see that with five bits we can now count from 0 (with all the bits toggled to 0) to 31 (when all the bits are toggled to "1"). And, we can get any number in between by toggling some bits to "1" and others to "0.
Total
E
D
C
B
A
We can also start to see the pattern for how the multipliers work. Every time we add a new bit we double the value of the multiplier from its predecesor.
So, we start with:
"A" with a multiplier of 1x
"B" with a multiplier of 2x
"C" with a multiplier of 4x
"D" with a multiplier of 8x
"E" with a multiplier of 16x
If we added three more bits, they'd be:
"F" with multiplier of 32x
"G" with multiplier of 64x
"H" with multiplier of 128x
Binary Numbers
Putting the bits into an order with the highest multiplier first has an interesting effect. We can now read all the bits together and treat them like their own number. And, those numbers always correspond exactly to specific Total values.
For example:
Total: 0 = Memory: 00000
Total: 1 = Memory: 00001
Total: 2 = Memory: 00010
Total: 3 = Memory: 00011
We can make this even clearer by remove all the zeros from the start of each memory number. Here's a full list of the thiry-two possible values we can produce with the five bits in our prior example.
| Total | Memory w/ 0s | Memory w/o 0s |
|---|---|---|
| 0 | 00000 | 0 |
| 1 | 00001 | 1 |
| 2 | 00010 | 10 |
| TODO: | TKTKTK | TKTKTK |
The Rules Of Computer Bits
We now have the complete set of rules for how computers work with bits:
Bits can be collected together in a computer's Memory
Each bit can be either a 1 or a 0
Each bit in a collection has a multiplier assigned to it
The multipliers for each collection of bits start at 1 and double for each bit in the collection
They may not seem like much, but we'll see in the rest of this post how those four rules are the foundation of everything computers do.
Letter And Number Examples
Moving Up And Down
So far, each button on the Screen has been paired directly with a single bit in Memory. Apps can also use buttons that control multiple bits at the same time.
For example, here's a counter with five bits in Memory but only two buttons. One that adds to the Screen's Total and one that subtracts from it.
B:
C:
D:
E:
Total
E
D
C
B
A
Something to notice here is that clicking "Subtract" when the Total is "0" or clicking "Add" when the Total is 31 doesn't do anything. That's because our Memory can only deal with 32 values. It's 0 when all the bits are toggled to "0", and it maxes out at 31 when all the bits are toggled to "1".
We'd need more bits in Memory to use more numbers. And, we'd have to come up with a way to deal with negative numbers. (We'll see an approach we can use for that later when we talk about letters.)
Converting Bits To Letters
Everything we've done to this point has displayed numbers on the Screen based directly on the value of the bits in Memory (i.e. we've either displayed them direclty or added them together with their multipliers to get a Total value).
Since the bits in a computer's Memory can only be 1s or 0s we'll have to come up with a new technique to handle letters. We'll do this by creating a "Memory Map Dictionary" which works like this:
The Memory Map Dictionary contains multiple "entries"
We'll add a new entry for each letter we want to be able to display on the Screen
We'll assign a unique number to each letter starting at 1 and going up by one for each new entry
For example, we can make a Memory Map Dictionary of letters in the U.S. English alphabet that looks like this:
A = 1
B = 2
C = 3
etc...
X = 24
Y = 25
Z = 26
The computer can look up entries in the Memory Map Dictionary using either the letter or the number. So, it can look up the letter "B" to see that its number is "2". Or, it can go the other way and look up the number "25" to see that its corresponding letter is "Y".
With this Memory Map Dictionary the computer can store number values in bits and translate them into the letter to display on the Screen.
B:
C:
D:
E:
Total
Letter
E
D
C
B
A
(Note: five bits gives us the ability to count from 0 to 31. Since there are only 26 letters in the U.S. alphabet, I set the entries in our Memory Map Dictionary for values 27-31 to say "no letter ###".)
More Than Letters
Of course, there are more than just U.S. English alphabet letters involved in writing. Punctuation, accent marks, and languagues like Chinese, Japanese, and Korean that use entirely different characters, for example.
For a real-world computer app we'd want to be able to handle them all. Thankfully, a bunch of folks already got together and created a Memory Map Dictionary that includes everything for us. It's called "Unicode Transformation Format (8-bit)" (or, UTF-8 for short). Here's a basic example that uses it.
Total
Character
H
G
F
E
D
C
B
A
(Hint: The UTF-8 standard includes lots of characters that don't show up under various circumstances. So, you'll see "[invisible]" a lot. The U.S. English "A" is located at "01000001" which you can get to by toggling bits "G" and "A" to 1 and then going from there)
Typing A Letter
So far we've been using buttons to update the values of the bits in Memory, but you wouldn't want to have to click a bunch of buttons every time you want to type something. Instead, you'd want to use a text box like this one where you can type a letter.
B:
C:
D:
E:
F:
G:
H:
Total
H
G
F
E
D
C
B
A
It's important to point out that the difference here is completely on the Screen side of things. We're interacting with a text box instead of a bunch of buttons, but the bit values the computer uses in Memory are exactly the same as when we set them individually in the prior examples.
If you type a lowercase "a" in the box you'll see "01100001" in the Memory. If you go to the prior example and toggle bits "G", "F, and "A" to "1" you'll see the same thing in Memory and the lowercase "a" listed as the Character on the Screen.
Typing Words
Let's take the step from letters to words. We'll still use bits in Memory, but things are going to look a little different. Our UTF-8 example above used eight bits for the letter. We'll continue with that, but set up our Memory so it can hold multiple letters. To make things easier to read, I'm removing the switches and grouping each collection of eight bits together.
Type a single letter and you'll see the first eight bits that represent that letter. Type another letter and you'll see the next eight, etc... I recommend starting with a uppercase "A" and an lowercase "z" for the first two letters to make it easy to see the differences in the bits for each letter in Memory.
(Note: UTF-8 values can be more than eight bits. If you only type U.S. English letters, numbers and spaces you'll only see eight bit entries and everything will line up. However, if you type a character like "≈" you'll see longer strings of bits. We could have set up the examples so everything used a higher number of bits to keep things lined up. In real-world programs you'd absolutely want to do that, but limiting to eight bits for these examples makes them easier to read.)
Introducing Bytes
Grouping bits into sets of eight is so common in the computer world that a group of that size has its own name: byte
Pronounced "bite", it's what's being referred to in words like "Megabyte", "Gigabyte", and "Terabyte".
Depending on how the term is being used, a Metabyte is either 1,000,000 or 1,048,576 bytes. You can read about the different definitions on the Megabyte Wikipedia page. But, at it's most basic, if we limit our letters to eight bits that means a computer with 1 megabyte (MB) of memory can work with up to 1,048,576 letters at the same time.
Color Examples
A Color Toggle
We've used bits to calculate numbers and to make letters. Now, let's use them to make colors.
We'll start with two colors (Black and Bright Green) and we'll use a single bit to toggle between them. We'll make the color Black when the bit is "0" and Bright Green when the bit is "1".
Four Shades Of Green
To add more colors, we'll add more bits and create a new Memory Map Dictionary that assigns colors to each number:
0 = Black
1 = Darker Green
2 = Middle Green
3 = Bright Green
Total
B
A
A Shade Slider
Let's replace the two toggle buttons with a slider which makes for a nicer interface for changing between our four colors.
B:
-
Total
0 3
B
A
All The Shades Of Green
Now, let's use eight bits (aka one byte) for the color. That'll give us Black when all the bits are "0", and 255 varying shades of Green (some of which are so close to black that it's hard to tell they have any color at all, but they do). With that many shades we can make a very smooth color slider.
B:
C:
D:
E:
F:
G:
H:
Total
0 255
H
G
F
E
D
C
B
A
Intro To Color Theory
Our next step is to be able to pick any color we want (not just a shade of green). Before we do that, we need to cover a little bit about how Screens work in the real world. We'd need an entire post to really get into the details but for now we can work with this:
Standard screens are made from of thousands of little dots called Pixels
Each Pixel is built with three tiny lights in them. The first one is Red, the second is Green, and the third is Blue
Each of the Red, Green, and Blue lights can be turned up and down on a dimmer individually. The effect is the same thing we did with the Green slider in the previous example. When the dimmer is all the way down no color comes out of the light (i.e. it's Black).
As the dimmer moves up, the color starts getting brighter until it's all the way up. At that point, it's pure Red, Green, or Blue
Here's an example sliders for each of the individual colors
H
G
F
E
D
C
B
A
H
G
F
E
D
C
B
A
H
G
F
E
D
C
B
A
Footnotes
-
(id:negative)Negative Numbers
TODO: Write up how negative numbers work